Showing posts with label Recipes. Show all posts

Wednesday, December 25, 2019

Christmas Morning Blueberry Buttermilk Breakfast Bake

Christmas Morning Blueberry Buttermilk Breakfast Bake
Wonderfully delicious!

Christmas Morning Blueberry Buttermilk Breakfast Bake

Ingredients:
1/2 cup butter, room temperature
zest from 1 large lemon
1 cup sugar (Set aside 1 T. for sprinkling over the top later)
1 egg, room temperature
1 tsp vanilla
2 cups all-purpose flower (Set aside 1/4 cup to toss with blueberries)
2 tsp baking powder
1 tsp salt
2 cups fresh blueberries
1/2 cup buttermilk

Preheat the oven to 350 degrees F.    

Cream the butter, sugar and lemon zest until light and fluffy.  Works great in the kitchen aid!
Add the egg and vanilla and buttermilk and beat until combined.
Meanwhile, toss the blueberries with the 1/4 cup flour, then whisk together the remaining flour, baking powder and salt. 
Add half the flour mixture to the batter, and stir with a spatula to incorporate.  
Add all the buttermilk.  Stir.  Add remaining flour and mix until flour is absorbed.
Fold in the blueberries.  (Leave the excess flour from the blueberry bowl behind.)

Grease an 8- or 9-inch baking pan (I like my pink pie plate.) with butter or non-stick cooking spray.
Spread the batter in the pan, and sprinkle with remaining sugar.

Bake for about 1 hour.  [I start checking done-ness at about 45-minutes.]


Sunday, January 27, 2019

The Closest Thing to Mr Miller's Cranberry Walnut Bread


I came across this no-knead recipe for an artisan style cranberry honey walnut bread, and thought I'd give it a try.  It worked!  We all agreed that this recipe is a keeper!  It's from The Busy Baker.

My mother-in-law used to get a yummy cranberry bread in Lancaster, PA, from a baker she called Mr. Miller.  Maybe you know him?  His might have been a little more sourdough-y.  But this one is still a keeper.

It requires the dough to rise for 12-18 hours.  We discovered that a good place for rising (in our cold winter house) is above the dishwasher, as it releases some heat during the wash cycle that transfers through the countertop.


Tastey toasted!

Saturday, January 26, 2019

If on a Winter's Evening : Pho at Home - Vietnamese Beef Broth

Vietnamese Pho

It worked!  I signed up for a Vietnamese Cooking class at Craftsy (now BluePrint) with Andrea Nguyen where she teaches some of the classics of Vietnamese cooking.

I'd tried to make Pho once before in the crock pot with a purchased muslin bag of Pho spices, but I left them in too long, and the flavors got funny.  Very disappointing batch.   Also, the recipe didn't explain a lot of things that Andrea Nguyen explained in the class video.  Very worth the price!

This time it worked marvelously!


Secret 1 : Char the aromatics (onion, ginger, shallots) -- I mean really roast them over a flame until they are CSI burnt.   They will be soft and roasted on the inside -- just what you need for the broth.  You pull off the burnt outer crust before adding these to the pot.


It took about 15 minutes to get to this point on our gas stove.  Next time, I'll probably cut the ginger in half the long way.


Secret 2 : Get good beef bones (organic and grass fed).  Par-boil them to release the initial scum, then throw that water away.  Wash the pot; Rinse the bones, add more water and then simmer your broth for 3 hours with the spices and aromatics.

We used sturdy neck bones from a local meat supplier who sells organic and grass-fed beef.
I am convinced this makes a huge difference in the quality of the broth.  My husband tried to make Pho a long time ago when he lived in Houston with conventionally raised beef bones.  The scum stage never ended, and it stank to high heaven.  That's when he became convinced that there truly is a difference in quality between conventional and organic meats -- extending to veggies, too.

Andrea Nguyen recommends the big leg bones with lots of marrow.  Not sure if that would release more scum that I got with the neck bones, or not.  I'm happy with the way mine turned out -- and so are my boys who asked me to make this regularly!  Which is high praise, since I don't often cook anymore.

Secret 3 : Toast the spices before you add them to the pot. This brings out their flavors beautifully!

Here it is just beginning to simmer with the spices and aromatics.  
The bubbles coming up now are "clean."
  

 The simmering goes on for 3 hours.  ;-) 


After a while, it takes on this golden color as the shallots, onions, ginger, and spices give up their flavor to the broth.


This is all the "stuff" that gets strained out of the final broth and tossed.  The aromatics have softened and disintegrated.  The cinnamon stick has unrolled itself.  The black cardamom has plumped up with the added moisture.  The dried shrimp have re-hydrated.  It's all kind of soft and mushy.   All the flavor is in the broth.

We strain it a second time through a finer strainer, and a jelly-like substance gets held back.  I wonder if that's the marrow?  She says you can spread it on bread if you like that.

And here is the final golden broth, which smells divine! 

Here is a version of Andrea Nguyen's Pho Bo Recipe from The Steamy Kitchen, written up by Jaden.
[I am including this here for my own future reference when I can't find the paper recipe.  It's not exactly the same as the one Andrea used in the Craftsy class, but it's close. ;-)  I also made a smaller portion for 4 people, but now that we know it's a good recipe, we'll make bigger quantities, and freeze the broth to use later.]

Vietnamese Pho Recipe (Beef Pho)
Prep Time : 1 hr
Cook Time : 3 hrs 30 mins
Total Time : 4 hrs 30 mins
Recipe adapted with permission from Into the Vietnamese Kitchen Cookbook by Andrea Nguyen. Note: You can find "Pho Spice Pack" that includes all the spices at Asian markets. [MM: This spice pack didn't work so well for me.  I prefer to mix my own.]  In Andrea's cookbook, she uses star anise, cloves and cinnamon stick. Some prefer the addition of fennel, coriander and cardamom, and I've noted those ingredients as "optional" in the recipe.
Servings: 8 people
Calories: 292 kcal
Author: Jaden
Ingredients  For the Pho broth
  • 2 yellow onions unpeeled, sliced in half
  • 4 inch piece fresh ginger unpeeled, sliced in half
  • 5 pounds beef leg or knuckle bones [MM : We used neck bones.]
  • 6 quarts water
  • 5 star anise
  • 6 whole cloves [MM : optional - I did NOT use cloves]
  • 1 cinnamon stick
  • 1 tablespoon coriander seeds optional [MM : optional - I did NOT use Coriander]
  • 1 [BLACK] cardamom pod
  • 1 tablespoon fennel seeds 
  • 1 pound boneless beef chuck, rump brisket or cross-rib roast, well trimmed, and cut into large chunks
  • 1/4 cup fish sauce
  • 1 tablespoon sugar or 1-inch chunk of yellow rock sugar
For the Pho Bowls
  • 2 pounds small flat rice noodles dried or fresh
  • Cooked beef from the broth
  • 1/2 pound eye of round sirloin, London broil, flank steak or tri-tip steak, thinly sliced across the grain
  • 1 yellow onion sliced paper-thin, soaked in cold water to cover for 30 minutes and drained
  • 2 scallions green parts only, thinly sliced
  • 1/3 cup chopped fresh cilantro leafy tops only
Garnish for Pho Recipe
  • 3 cups fresh bean sprouts about 1/2 pound
  • Mint
  • Thai basil
  • 2 Thai or serrano chiles thinly sliced
  • 2 limes cut into wedges
Instructions
Make the Pho Broth
  1. Set baking rack 8 inches below heating element. Turn oven to low broil. Place the onion and ginger halves, cut side up, on a baking sheet. Brush the halves with a little bit of oil. Broil until the onion and ginger slightly charred, about 10 minutes, turning half-way. Remove from heat and cool.
  2. Parboil the beef bones: Fill a large stockpot (about 12 quart capacity) with water and bring to rapid boil. Carefully lower in the bones. Boil vigorously for 3 minutes to release the impurities. Dump bones and water into a clean sink, and rinse the bones with water to wash off any clinging residue. Quickly scrub pot clean and fill with about 6 quarts of clean water. Return bones to pot. Add the charred onion, ginger, spices, beef, fish sauce, and sugar to pot.
  3. Bring water to boil over high heat, and lower heat to gentle simmer. Simmer, uncovered, for 1 1/2 hours.
  4. While simmering, use a ladle or fine-mesh strainer to spoon off any scum that rises on top.
  5. At this point, the boneless meat should be slightly chewy, but not tough. Use tongs to transfer the meat to a bowl. Cover with plastic wrap and refrigerate. Meanwhile, maintain the broth at a steady simmer for 1 1/2 hours longer.
  6. Strain the broth through a fine-mesh sieve (or a coarse-mesh sieve lined with cheesecloth) positioned over a pot. Discard the remaining solids. Use ladle or fine meshed skimmer to skim as much fat as possible from the top of the broth. Taste and adjust the flavor with salt, fish sauce and sugar. There should be about 4 quarts (16 cups) of broth.
Assemble the bowls
  1. If using dried rice noodles, cover them with hot tap water and let them soak for 15 minutes, or until they are pliable and opaque. Drain in a colander. If using fresh rice noodles, untangle them, place in a colander, and rinse briefly under cold running water.
  2. Cut the cooked beef across the grain into thin slices. Freeze the raw beef for 15 minutes, then slice it across the grain into very thin slices. Set all beef aside. Ready the raw onion, scallions, cilantro leaves for adding to the bowls. Arrange the garnishes on a plate and put on the table.
  3. To ensure good timing, bring the broth to a simmer over medium heat as you are assembling the bowls.
  4. At the same time, fill a separate large pot with water and boil. For each bowl, place a portion of the noodles on a strainer (or mesh sieve) and dunk the noodles in the boiling water for 10 seconds. Immediately pull the strainer from the water, letting the water drain back into the pot. Empty the noodles into a bowl.
  5. Top each bowl of noodles with cooked and raw beef, arranging the slices flat. Add a bit of raw onion, scallions, cilantro leaves to each bowl.
  6. The pho broth needs to be boiling hot, to cook the raw beef slices. Raise the heat of the broth to a boil. Do a final taste and make any last minute adjustments with fish sauce and sugar. Ladle about 2 cups of broth into each bowl. Serve immediately with plate of garnishes.

Bon Appetite!

Friday, June 29, 2018

Rhubarb Custard Crunch


This makes a double batch at our house.
Ingredients :
8 cups rhubarb, diced
2 c. sugar
1/2 c. flour

Custard :
6 eggs
1 cup heavy cream
zest of 1 lemon
1 Tsp vanilla
1/2 tsp salt

Topping :
1 c. brown sugar
1 c. flour
1 c.oatmeal
1 stick of butter (1/2 c.)

Preheat oven to 350 degrees F.

Blend topping and set aside.  Use a pastry cutter or squeeze with your hands/fingers to get those pleasing lumps.

Combine rhubarb, sugar, flour.  Pour into a 9x13 inch glass baking dish.
Mix custard. combine with rhubarb in pan.  The custard will will in any spaces between the rhubarb.
Cover with topping.

Bake for 50 minutes.

Serve with ice cream or yogurt. Yum!

* This recipe is an amalgam of several other "found" recipes.  No one (before us) has quite put it together link this!

Sunday, December 27, 2015

Taco Dip Recipe


Taco Dip

Taco Dip
Ingredients :
 
8 oz. Cream Cheese
8 oz. Sour Cream
1 pkg Taco Seasoning Mix
   (OR  2 tsp Chili Powder plus 1 tsp garlic powder)
 Blend with a mixer until creamy and smooth. Spread in a pan or platter as the base layer.

1 can refried beans
1 can Herdez Verde (green chili sauce)
Mix these together and spread atop the cream cheese layer.  You won't need the whole batch of beans for the taco dip, so save the rest for dipping chips directly.

Additional layers as desired.  Here are some of our favorites, chopped :

Shredded cheese (as you'd use for tacos)
Black Olives
Red and/or Yellow Peppers
Green Onions

Serve with nachos.

I usually make this for Thanksgiving and Christmas-time feasts as an appetizer.  Time to post the recipe here for easy access.

Thursday, March 26, 2015

Crock Pot Cream of Broccoli Soup


I found this recipe here.   It's remarkable how much it comes out looking like the canned soups -- except, I know exactly what's in this soup!  No mystery ingredients.

Prep Time : 10 minutes
Cooking Time : 5-6 hours

Ingredients

Directions

  1. In a skillet, heat butter, add onion and simmer about 5 minutes or until soft but not browned.
  2. Stir in flour and seasonings.
  3. Add onion mixture to crock pot and slowly add milk and water, stirring until well blended.
  4. Add broccoli and cook on low until soup reaches desired consistency, approximately 5-6 hours.
  5.  Add the cream in the last 20 minutes
  6. Add additional spices to taste -- ie, thyme, garlic powder, etc.

Saturday, December 21, 2013

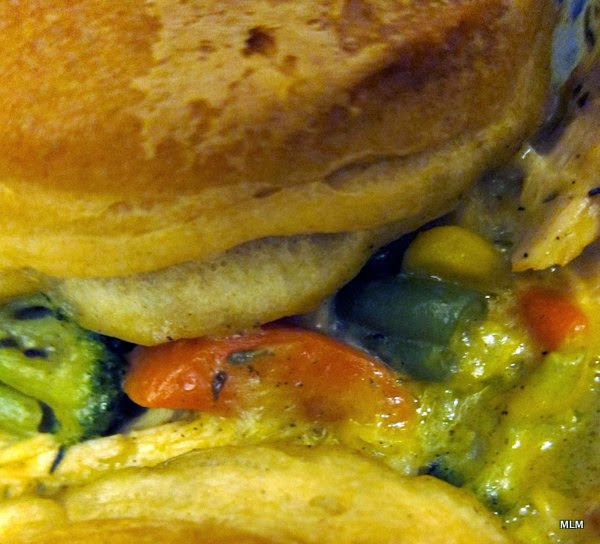
Easy Chicken Pot Pie

Easy Chicken Pot Pie

1 can cream of chicken soup (condensed)
1 cup milk
3 cups shredded chicken
1pkg frozen mixed vegetables (peas, carrots, green beans, plus broccoli, cauliflower, etc)
1/2 tsp Thyme Leaves
Poultry Seasoning (to taste)
Ground Black Pepper

1 Can Refrigerator Biscuits
(If you're really feeling ambitious, mix up a batch of home-made buttermilk biscuits.)

Boil 2 chicken breasts for 20-25 minutes, then shred them. 
Stir-fry the frozen vegetables to make sure they are thawed and cooked before adding them to the pot pie.  

Preheat oven to 350 degrees.

Mix the soup and milk in a large bowl. Stir in sauteed veggies and chicken.  Add the Thyme, Poultry Seasoning, and Ground black pepper.  Stir and pour into a baking dish.  Top with the refrigerator biscuits.   Bake for 45 minutes or until hot.

Yummy on a cold winter's day.

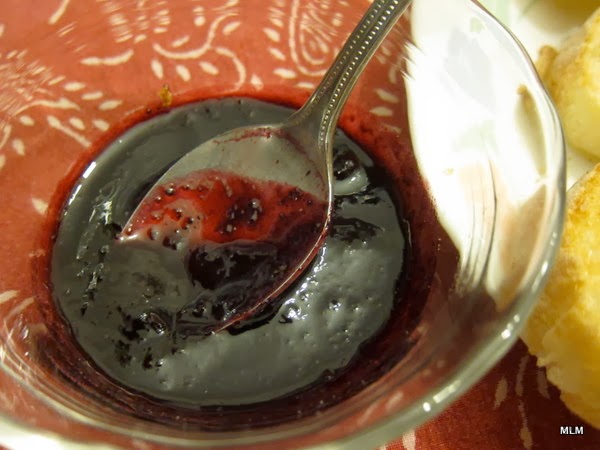
Blueberry Butter in a Crock Pot


Blueberry Butter in a Crock Pot

At the December Craft Sale, I bought a jar of home-made blueberry butter for my husband.  Unfortunately, when I got home, it was dark, and I didn't see it sitting on the back seat.  I unpacked some other things, and the nearly frozen jar hit the driveway pavement and broke.  ;-(    Sigh!
So I decided to make good on my gift, and make my own batch of blueberry butter.  It was easier than than I thought it would be.  The hardest part was committing to spend $11+ on 2.5 pounds of frozen blueberries.  I have to say : It was worth it!

The Recipe
2.5 pounds frozen blueberries
1 cup white sugar
1/2 tsp cinnamon
1/4 tsp cardamon
1/4 tsp ground cloves

1 lemon, zested
Juice of 1 Lemon

Pour the frozen blueberries into a crock pot.  Let them cook for 6 hours.  Stir every hour or so.  After the first 2 hours, I propped open the lid so the steam could escape and it could reduce to a proper fruit butter. 

In the last hour of cooking, I used a stick blender to puree the mixture, and smooth out the lumps.  Then I added the sugar, and spices.  You may need to add more sugar--not all blueberries are created equal.  This batch seemed sweet enough.

SO GOOD!  It tastes like mulled blueberry cider--but spreadable.  Now if we only had some buttermilk biscuits fresh from the oven!

Thursday, February 28, 2013

Lemon Poppy Seed Bread / Cake


This is the preferred birthday cake at our house.  We even had a lemon poppy seed cake at our wedding!  Yum!  It's a family favorite.  The paper on which the recipe is currently written is getting very tattered, torn, and tired.  I thought it was time to set this recipe down on Hidden Passages so we don't lose track of it.  

(Recipe makes 2 loaves)

3 cups flour
2-1/4 cups sugar
1-1/2 tsp baking powder
1-1/2 tsp salt
3 eggs
1-1/2 cups milk
1-1/8 cups salad oil
3 T Poppy Seeds

Mix all ingredients together and beat about 2 minutes.  That's what the recipe says, but I just mix it until everything appears to be evenly combined.


Here's the batter.  This stage always reminds me of when Baba Yaga ordered Vasalisa to soirt through a pile of dirt and poppy seeds.  What a job!

Grease 2 loaf pans.

Bake at 350 degrees F for about 1 hour, or until a knife inserted in the center comes out clean.

Once the breads/cakes are in the oven, combine the ingredients for the topping.
The sugar needs time to dissolve in the lemon juice.

     3/4 cup sugar
     1/4 cup lemon juice
     Splash of Lemoncello

After removing from the oven and while still hot,  brush the lemon juice/sugar mixture on top.

Alternative Honey-Butter Topping :
     This is also delicious with honey and butter as a glaze.
     Melt equal parts honey and butter and pour on top.  Yum!

Thank you to Debbie Uerkwitz for giving us this recipe so many years ago.
I tend to categorize recipes according to who gave them to me.
This recipe lets me remember RDU with fondness.  :-)


                       CL at 42.

Saturday, April 18, 2009

Santa Fe Tofu


Hoo-Ya! I can still cook a decent meal!

At our house, CL does most of the cooking -- ok -- virtually ALL of the cooking. But when I have to, I can still cook. Here's one of my favorites :

Santa Fe Tofu
Tofu, grilled and sliced
(Sweet) Red Bell Pepper
Green Onions, chopped
Pecans or Walnuts
Garlic, minced
Olive Oil

Drain a block of firm tofu. Slice it, and grill it on a hot griddle until done. (No oil needed!)
Stir fry garlic until it smells garlicy. Add sweet red pepper and nuts. Add tofu. Add green onion last (don't let them wilt).

Serve over angel hair pasta with grated Sartori SarVecchio Parmesan and Renaissance Farms Sweet-Basil Pesto. Good ingedients make a huge difference!

Friday, November 23, 2007

One More Recipe for Fall : Wisconsin Cranberry Walnut Pie


This is called a pie, but it's more like a coffee cake ... I left out the pie shell here, planning to serve it more like crisp (without the crisp layer).

The picture above is before baking, and before the sweet, buttery batter is spooged across the top (see 1/3 pie to the left). I had to take a picture because I thought the cranberries were so pretty!

Wisconsin Cranberry Walnut Pie

1 9-inch unbaked pie crust, homemade or purchased
2 cups whole fresh cranberries washed, drained
1 cup whole walnut halves
1/4 cup brown sugar
1/3 cup butter, melted and cooled
1/2 cup flour
1/8 tsp salt
1/4 tsp soda

Place cranberries and walnuts in unbaked pie shell. Sprinkle evenly with brown sugar.
In a small mixing bowl, mix egg, butter, flour, salt, sugar, soda. Mixture will be thick. Spread evenly over cranberry layer with spatula.
Bake in pre-heated 325-degree oven for 60-65 minutes. (You may increase oven temperature to 350 degrees the last 5 minutes if you like a golden-brown surface.)
Makes 8-10 servings. Serve warm or cold.

The cranberries are from Wisconsin. :-)

Wild Rice Cranberry Salad


Here's the recipe for my very favorite Thanksgiving dish. I've been making it every year for several years now. There's always a lot left. Few other people seem to know just how tasty it is, so I'm happy to have the left-overs! We're getting ready for the annual Saturday-After Thanksgiving Feast at our house, so we haven't really celebrated yet ... My husband cooks. I just do appetizers and side dishes.

I got the recipe from Ann B. in Madison about 10 years ago. I have modified it only slightly.

Wild Rice - Cranberry Salad

1 cup wild rice
2-3/4 cups water
1 pat of butter
1 cup dried cranberries
1/4 cup fresh mint, chopped (1 T dried)
4 green onions (scallions), chopped
1/2 c olive oil
1 cup pecan halves, chopped
Rind of 1 orange, grated
3/4 c. orange juice
black pepper, freshly ground

Combine water, butter and wild rice. Simmer about 40 minutes until the rice starts to open out. While the rice cooks, combine mint, cranberries, orange rind, juice and scallions. Let stand. When rice is done, drain in collander. Add olive oil to rice. Combine all ingredients except pecans. Let stand for at least 2 hours for flavors to blend. Just before serving, add the pecans.

This is one dish that gets better with age!

In Northern Wisconsin, the Native Americans grow and harvest the wild rice I buy. I'm a little concerned because I had heard that the crop this year was not very good due to lack of water on some of the lakes this year ... Global warming in our own back yard.

Monday, August 6, 2007

Recipes - More than Food!


I was looking through my recipe box this weekend. I don't cook very often anymore--my husband is the chef at our house, and I try to stay out of his way in the kitchen.

It seemed with many of the tired, warn, food-stained cards, I would get "warm fuzzies" as I remembered the time, the place, laughter, friendships, and even a few regrets over these recipes. And I realized that Food is much more than sustenance to me.

One in particular was written in the script of a dear friend, now gone : Sandy's Lentil-Bulger Salad.

I've never been able to do right by bulger (and everyone says it's so easy!), so I don't get dish very often these days. It was a rare treat to see her hand-writing alive and well in among my recipes. Even after 6 years, I still miss her and think of her often. Sigh!


Summit Ave. Coop, early 1990s (pre-restoration)

A few years ago, I was craving a certain Chocolate Zuchinni Cake that Kelly McVittie used to make at Summit Ave Coop, where we lived with 17 other people in Madison, WI. I hadn't taken the recipe with me, because I knew it would always be there at the Coop. You see, I had started a blank book entitled "Favorite Recipes of Summit Coop." It was the ugliest blank book with a teddy bear on the the cover : Hello Kitty Cute. (There was a reason for that : If it was cute and ugly, it would be less likely to be stolen, right?) New Coop Cooks needed some help and guidance in preparing a meal for 18 people. The purpose of the cookbook was to help with proper proportions for this size crowd, and recipes that seemed to please the house members and stayed within the $26 per meal budget guidelines. I knew Kelly's recipe would still be in that homegrown cookbook. So I called the house and asked for the recipe ... To my horror, the poor soul who answered the phone said that the House Cookbook had disappeared, probably the result of a hate crime against one of the remaining members : A former house member was trying to get back at another house mate for whatever reason ... It was gone. Those recipes were GONE!

Even though I haven't lived at Summit Coop since 1998, I felt violated, too. I started that cookbook. It belonged to me as much as to every other member of the House. It was full of Summit lore and culture built up over the years. Recipes that I knew and loved gone down the memory hole as people moved on and moved out of Summit. Fortunately, I still have many of those recipes from people I met at the Coop ...

Mr. Wang's Stir Fry #1 and #2
Mr. Qu's Kung Pao Chicken
Danielle's Korma
Anything by LeeAnne or Linda Kinney
Sinden's Souffle
Susan's Curried Carrots with Raisin & Lentils
Susan's Greek Garlic Soup
Susan's Rhubarb Crisp
Ling's Spicy Eggplant
Wei Ching's Winter Ginger Chicken Soup
Duane's Burrito Pie
Miriam's Great Aunt Catherine's Pumpkin Pecan Pie

Not all my recipes have ties to Summit. There was life and food before Summit (BS) : The comfort foods of eggs and milk ...

Gramma Matucheski's Egg Nog (There was never a written recipe for this. And my mom who is Director of Public Health in her county would have a heart attack if she knew I still ate raw eggs in this recipe ... She's investigated enough food poisonings cases to require me to cook the eggs.)

Heidi's Gramma's Bread Pudding brings back memories of Monday nights at Heidi and Beth's apartment where we'd watch Northern Exposure every week.

Another curious thing about my recipes is that they usually have a name attached to them. I used to file them according to the person who gave me the recipe. For example, "Susan's Rhubarb Crisp" would file under S. This system made perfect sense to me because they were all much more than recipes to me : They were memories! But this system never worked for my husband, so now, we file them under the food name, not by the maker. For example, "Susan's Rhubarb Crisp" is now filed under "R" for "Rhubarb Crisp." Although, we tend to use it more for Apple Crisp, so it could as also be found under "A" for Apple Crisp. (The organization of information is an art, not a science.)

Makes me wonder if some of the recipes I made at the Coop were remembered so fondly by other members? Refried Beans for tacos/burritoes, black bean soup, crab puffs ...