Sunday, August 9, 2020

Peach Butter with Honey and Lemon

Peach Butter

"Taste a little of the summer.
My Gramma put it all in jars."
--Greg Brown

The last box of fresh peaches for the season.   Just trying to make it last a little longer ...

Peach Butter

8-10 Peaches, ripe
2/3 - 3/4 cup honey
Zest of 1 lemon
Juice of that same lemon


Skin the peaches--the easy way. I know this seems like a lot of extra work, but believe me, it makes the process go so much quicker and easier that it is worth a few extra pots and bowls.
 
Drop the peaches in boiling water for 30 seconds.
 
Then put them in a bowl of ice-water  for 90 seconds.
 
 
The peels should be very easy to pull off the peaches now.  You won't waste any of the good peach pulp.


Cut the peaches into approximately 1-inch chunks into the crock pot.
 
 
Add the zest of 1 lemon.
Add the juice of 1 lemon.
 
 
Add 2/3 - 3/4 cup honey.
We get honey from Mike-the-Honey-Man at our local Oshkosh Farmer's Market.
 
Do not add any extra water.  The peaches will cook down and make their own sauce.

Cook for 4-5 hours in the crock pot.
Hour 1 - High,with lid closed.
Hour 2 - Low heat, lid closed.
Stir periodically.
 

Hour 3 - Crack the lid open with a wooden spoon, or other prop so that some of the liquid can escape.
Hour 4 - Keep going.  Fruit will continue to soften, until it doesn't.

When it's done cooking, use a stick blender to make it smooth and creamy.
Careful -- It will still be hot!


Pour (or spoon) into prepared jelly jars.
 

You can go ahead and sterilize the jars if you want to officially can them.  We put them in the freezer, so don't worry so much about sterilization procedures.   If you do freeze the jars, leave a little space at the top of the jar, so the peach butter can expand as it freezes, without breaking the jar.  
 
Don't forget to have some for yourself.  I had an extra bowl-ful that wouldn't quite fill another jar.
Pure sunlight in a bowl!

Some notes on the construction of this recipe:  I looked at several peach butter recipes, and finally arrived at my own procedure above.  I did not like the brown sugar in one recipe, and the stove-top method required constant attention.  I didn't have to worry about it burning in the slow cooker, and the long cooking time adequately broke down the peach pulp so it was easy to blend smooth.  The honey version gave the perfect sweetness, without an aftertaste, and kept it from going bad in the fridge long term.  Yeah for honey's antimicrobial properties, even though I essential pasteurized it during the cooking process.  The lemon juice added a nice acidity for balance.  And I thought why not add the lemon zest in, too, for a little extra citrus kick?    Maybe next time, we'll add a little ginger juice, too.

Friday, June 12, 2020

Holly Matucheski December 25, 1950 - June 3, 2020


Holly Rae Matucheski, RN, BSN
December 25, 1950 - June 3, 2020


The photo montage we created for the funeral.
The background music is "Forever Young" by Rod Stewart.
The new Blogger only allows this tiny port hole, so if you want a wider view, try this link.


Folder printed by the Bradley Funeral Home.
My Dad picked out eagle theme.


Program for Holly's Funeral Service


Special Song - "Time of my Life" (from Dirty Dancing)
"I've had the time of my life, and I owe it all to you."

Holly said that friends were the most important thing for a woman.
In that respect, this song was meant to be a THANK YOU from Holly
to everyone who made her life as wonderful as it was.


Ashleigh Halverson read "A Letter from My Heart" to Holly,
who inspired her to read and to become a nurse.

Kay Solitto read Holly's Obituary,
adding some of her own commentary and context.


Betsy Ahner's touching Euology for Holly [pdf].

I asked Bradley if they could set up a Christmas Tree. 
Even though it was June, they were happy to do so.
Since Holly was born on Christmas Day, Christmas time was always filled with light and magic for us.
The Christmas Tree hepled to bring back some of her spirit.


Also on display were some of her quilts:
The Red Canoe
[Carrie Zelazoski talked about teaching the block-of-the-month quilting class
where Holly made this quilt.]
Pine Trees


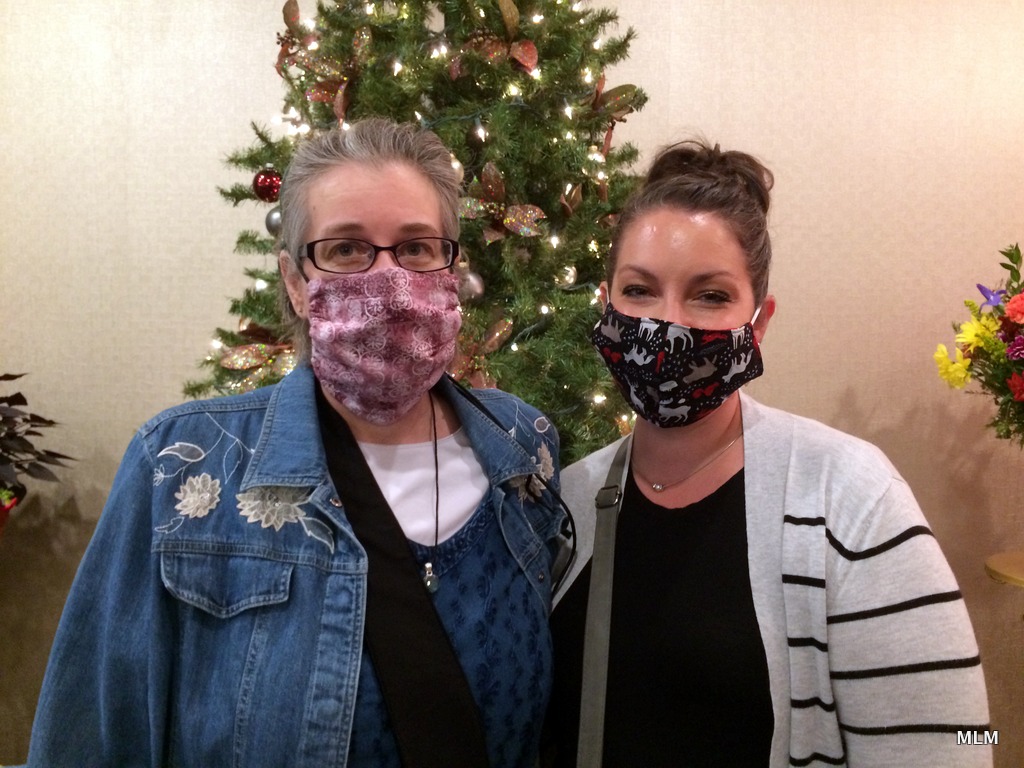
Not wanting Holly's funeral to be a super-spreader event for Covid-19, those of us who work in health care wore masks.  She was the Public Health Officer for Langlade County for many years!


Michele and cousin Ashleigh.

Even my sister Amanda (top right) in Japan was able to attend via Zoom.
We had a stand set up with an iPad and a sign saying:  "Talk to Amanda in Japan."
She attended about 7 hours via zoom for the visitations and funeral service.
Due to the global pandemic, she was not able to attend the funeral in person as both the US and Japan had travel restrictions.


We picked daisies for the flower spray over the casket.
She had daisies in her wedding bouquet 51 years before.
It was so cold that January, the flowers froze on the way to the church.
From this angle, it kind of looks like her.


Doesn't quite look like her, but here she is ... after a long illness.


High school graduation photo, looking the way she did when Dad first met her.

Also on display was this scrap booking layout made by daughter Amanda Yoshida.
Along with the Wandering Geese quilt Holly made for daughter Michele and Christian.


Holly - Christmas 2018

Wednesday, January 1, 2020

Solstice Sleigh Ride

Sun Flares on a Solstice Sleigh Ride

For Christmas, I gave my family a sleigh ride.   
What better way to celebrate than by making some memories, experiencing the season!  

Long-time neighbors (The Ed Brandt Family) to my parents have horses -- not just any horses, but those big Budwieser-type Persheron (sp?) draft horses.  They offer sleigh / hay rides through the woods, with a stop at a bon fire where you can have a cook out. We kept it simple with s'mores and hot chocolate, cider, and tea.

It was a perfect day for a sleigh ride.  Not too cold.  Plenty of snow (almost 2 feet!) there (very little where we live). And a little winter sun for Solstice. 


Unfortunately, my Mom was not able to go along since she fell and injured her ankle.  She loves those horses, though.  And the chocolate pie I made for her birthday.


My Dad loves the woods. We had a nice time, even if it was just the four of us.

 Me with Oliver and my Dad watching the bonfire.


These are pics of the previous party coming back into the stable.

You can get a good idea of what the sleigh looks like, along with the beautiful winter day, and the northern Wisconsin landscape.


My Dad and CL at Brandt's stable, awaiting our sleigh ride.


Oliver with Sophie back at Grappa and Gramma's house.

Here's a nice video from someone in Sweden sharing the experience of being on a one-horse open sleigh.  Just trying to capture the moment for my mom who missed out.  

Here's another one.  Sorry-- I don't know how to embed the videos from FB.

And now for some mood music:


Wednesday, December 25, 2019

Christmas Morning Blueberry Buttermilk Breakfast Bake

Christmas Morning Blueberry Buttermilk Breakfast Bake
Wonderfully delicious!

Christmas Morning Blueberry Buttermilk Breakfast Bake

Ingredients:
1/2 cup butter, room temperature
zest from 1 large lemon
1 cup sugar (Set aside 1 T. for sprinkling over the top later)
1 egg, room temperature
1 tsp vanilla
2 cups all-purpose flower (Set aside 1/4 cup to toss with blueberries)
2 tsp baking powder
1 tsp salt
2 cups fresh blueberries
1/2 cup buttermilk

Preheat the oven to 350 degrees F.    

Cream the butter, sugar and lemon zest until light and fluffy.  Works great in the kitchen aid!
Add the egg and vanilla and buttermilk and beat until combined.
Meanwhile, toss the blueberries with the 1/4 cup flour, then whisk together the remaining flour, baking powder and salt. 
Add half the flour mixture to the batter, and stir with a spatula to incorporate.  
Add all the buttermilk.  Stir.  Add remaining flour and mix until flour is absorbed.
Fold in the blueberries.  (Leave the excess flour from the blueberry bowl behind.)

Grease an 8- or 9-inch baking pan (I like my pink pie plate.) with butter or non-stick cooking spray.
Spread the batter in the pan, and sprinkle with remaining sugar.

Bake for about 1 hour.  [I start checking done-ness at about 45-minutes.]


Sunday, January 27, 2019

The Closest Thing to Mr Miller's Cranberry Walnut Bread


I came across this no-knead recipe for an artisan style cranberry honey walnut bread, and thought I'd give it a try.  It worked!  We all agreed that this recipe is a keeper!  It's from The Busy Baker.

My mother-in-law used to get a yummy cranberry bread in Lancaster, PA, from a baker she called Mr. Miller.  Maybe you know him?  His might have been a little more sourdough-y.  But this one is still a keeper.

It requires the dough to rise for 12-18 hours.  We discovered that a good place for rising (in our cold winter house) is above the dishwasher, as it releases some heat during the wash cycle that transfers through the countertop.


Tastey toasted!

Saturday, January 26, 2019

If on a Winter's Evening : Pho at Home - Vietnamese Beef Broth

Vietnamese Pho

It worked!  I signed up for a Vietnamese Cooking class at Craftsy (now BluePrint) with Andrea Nguyen where she teaches some of the classics of Vietnamese cooking.

I'd tried to make Pho once before in the crock pot with a purchased muslin bag of Pho spices, but I left them in too long, and the flavors got funny.  Very disappointing batch.   Also, the recipe didn't explain a lot of things that Andrea Nguyen explained in the class video.  Very worth the price!

This time it worked marvelously!


Secret 1 : Char the aromatics (onion, ginger, shallots) -- I mean really roast them over a flame until they are CSI burnt.   They will be soft and roasted on the inside -- just what you need for the broth.  You pull off the burnt outer crust before adding these to the pot.


It took about 15 minutes to get to this point on our gas stove.  Next time, I'll probably cut the ginger in half the long way.


Secret 2 : Get good beef bones (organic and grass fed).  Par-boil them to release the initial scum, then throw that water away.  Wash the pot; Rinse the bones, add more water and then simmer your broth for 3 hours with the spices and aromatics.

We used sturdy neck bones from a local meat supplier who sells organic and grass-fed beef.
I am convinced this makes a huge difference in the quality of the broth.  My husband tried to make Pho a long time ago when he lived in Houston with conventionally raised beef bones.  The scum stage never ended, and it stank to high heaven.  That's when he became convinced that there truly is a difference in quality between conventional and organic meats -- extending to veggies, too.

Andrea Nguyen recommends the big leg bones with lots of marrow.  Not sure if that would release more scum that I got with the neck bones, or not.  I'm happy with the way mine turned out -- and so are my boys who asked me to make this regularly!  Which is high praise, since I don't often cook anymore.

Secret 3 : Toast the spices before you add them to the pot. This brings out their flavors beautifully!

Here it is just beginning to simmer with the spices and aromatics.  
The bubbles coming up now are "clean."
  

 The simmering goes on for 3 hours.  ;-) 


After a while, it takes on this golden color as the shallots, onions, ginger, and spices give up their flavor to the broth.


This is all the "stuff" that gets strained out of the final broth and tossed.  The aromatics have softened and disintegrated.  The cinnamon stick has unrolled itself.  The black cardamom has plumped up with the added moisture.  The dried shrimp have re-hydrated.  It's all kind of soft and mushy.   All the flavor is in the broth.

We strain it a second time through a finer strainer, and a jelly-like substance gets held back.  I wonder if that's the marrow?  She says you can spread it on bread if you like that.

And here is the final golden broth, which smells divine! 

Here is a version of Andrea Nguyen's Pho Bo Recipe from The Steamy Kitchen, written up by Jaden.
[I am including this here for my own future reference when I can't find the paper recipe.  It's not exactly the same as the one Andrea used in the Craftsy class, but it's close. ;-)  I also made a smaller portion for 4 people, but now that we know it's a good recipe, we'll make bigger quantities, and freeze the broth to use later.]

Vietnamese Pho Recipe (Beef Pho)
Prep Time : 1 hr
Cook Time : 3 hrs 30 mins
Total Time : 4 hrs 30 mins
Recipe adapted with permission from Into the Vietnamese Kitchen Cookbook by Andrea Nguyen. Note: You can find "Pho Spice Pack" that includes all the spices at Asian markets. [MM: This spice pack didn't work so well for me.  I prefer to mix my own.]  In Andrea's cookbook, she uses star anise, cloves and cinnamon stick. Some prefer the addition of fennel, coriander and cardamom, and I've noted those ingredients as "optional" in the recipe.
Servings: 8 people
Calories: 292 kcal
Author: Jaden
Ingredients  For the Pho broth
  • 2 yellow onions unpeeled, sliced in half
  • 4 inch piece fresh ginger unpeeled, sliced in half
  • 5 pounds beef leg or knuckle bones [MM : We used neck bones.]
  • 6 quarts water
  • 5 star anise
  • 6 whole cloves [MM : optional - I did NOT use cloves]
  • 1 cinnamon stick
  • 1 tablespoon coriander seeds optional [MM : optional - I did NOT use Coriander]
  • 1 [BLACK] cardamom pod
  • 1 tablespoon fennel seeds 
  • 1 pound boneless beef chuck, rump brisket or cross-rib roast, well trimmed, and cut into large chunks
  • 1/4 cup fish sauce
  • 1 tablespoon sugar or 1-inch chunk of yellow rock sugar
For the Pho Bowls
  • 2 pounds small flat rice noodles dried or fresh
  • Cooked beef from the broth
  • 1/2 pound eye of round sirloin, London broil, flank steak or tri-tip steak, thinly sliced across the grain
  • 1 yellow onion sliced paper-thin, soaked in cold water to cover for 30 minutes and drained
  • 2 scallions green parts only, thinly sliced
  • 1/3 cup chopped fresh cilantro leafy tops only
Garnish for Pho Recipe
  • 3 cups fresh bean sprouts about 1/2 pound
  • Mint
  • Thai basil
  • 2 Thai or serrano chiles thinly sliced
  • 2 limes cut into wedges
Instructions
Make the Pho Broth
  1. Set baking rack 8 inches below heating element. Turn oven to low broil. Place the onion and ginger halves, cut side up, on a baking sheet. Brush the halves with a little bit of oil. Broil until the onion and ginger slightly charred, about 10 minutes, turning half-way. Remove from heat and cool.
  2. Parboil the beef bones: Fill a large stockpot (about 12 quart capacity) with water and bring to rapid boil. Carefully lower in the bones. Boil vigorously for 3 minutes to release the impurities. Dump bones and water into a clean sink, and rinse the bones with water to wash off any clinging residue. Quickly scrub pot clean and fill with about 6 quarts of clean water. Return bones to pot. Add the charred onion, ginger, spices, beef, fish sauce, and sugar to pot.
  3. Bring water to boil over high heat, and lower heat to gentle simmer. Simmer, uncovered, for 1 1/2 hours.
  4. While simmering, use a ladle or fine-mesh strainer to spoon off any scum that rises on top.
  5. At this point, the boneless meat should be slightly chewy, but not tough. Use tongs to transfer the meat to a bowl. Cover with plastic wrap and refrigerate. Meanwhile, maintain the broth at a steady simmer for 1 1/2 hours longer.
  6. Strain the broth through a fine-mesh sieve (or a coarse-mesh sieve lined with cheesecloth) positioned over a pot. Discard the remaining solids. Use ladle or fine meshed skimmer to skim as much fat as possible from the top of the broth. Taste and adjust the flavor with salt, fish sauce and sugar. There should be about 4 quarts (16 cups) of broth.
Assemble the bowls
  1. If using dried rice noodles, cover them with hot tap water and let them soak for 15 minutes, or until they are pliable and opaque. Drain in a colander. If using fresh rice noodles, untangle them, place in a colander, and rinse briefly under cold running water.
  2. Cut the cooked beef across the grain into thin slices. Freeze the raw beef for 15 minutes, then slice it across the grain into very thin slices. Set all beef aside. Ready the raw onion, scallions, cilantro leaves for adding to the bowls. Arrange the garnishes on a plate and put on the table.
  3. To ensure good timing, bring the broth to a simmer over medium heat as you are assembling the bowls.
  4. At the same time, fill a separate large pot with water and boil. For each bowl, place a portion of the noodles on a strainer (or mesh sieve) and dunk the noodles in the boiling water for 10 seconds. Immediately pull the strainer from the water, letting the water drain back into the pot. Empty the noodles into a bowl.
  5. Top each bowl of noodles with cooked and raw beef, arranging the slices flat. Add a bit of raw onion, scallions, cilantro leaves to each bowl.
  6. The pho broth needs to be boiling hot, to cook the raw beef slices. Raise the heat of the broth to a boil. Do a final taste and make any last minute adjustments with fish sauce and sugar. Ladle about 2 cups of broth into each bowl. Serve immediately with plate of garnishes.

Bon Appetite!